Simple analyzer-modulator setup for Ableton Live

live_screen1
Simple example Live set with Analyzer and MIDIator. Spectral flux of the input signal will control Reverb Decay Time. Since we use only one input and it modulates its own reverb, the setup is not crossadaptive, but rather just an adaptive effect. The basic setup can be extended by adding more input channels (and Analyzers) as needed. We do not need to add more MIDIators until we’ve used up all of its modulator channels.

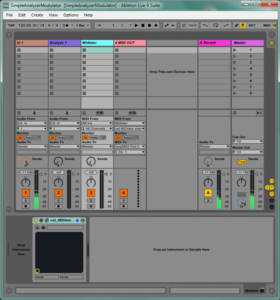
I’ve created a simple Live set to show how to configure the analyzer and MIDIator in Ableton Live. There are some small snags and peculiarities (read on), but basically it runs ok.

The analyzer will not let audio through, so we use two audio input tracks. One track for the actual audio processing (just send to a reverb in our case), and one track for the analyzer. The MIDI processing also requires two tracks in Live, this is because Live assumes that a MIDI plugin will output audio so it disables the MIDI out routing when a plugin is present on a track. This is easily solved by creating a second MIDI track, and select MIDIator as the MIDI input to that track. From this track we can route MIDI out from Live. You will want to set the MIDI out to a virtual MIDI device (e.g. loopMIDI on windows, IAC bus on OSX). Enable midi input from the virtual midi device (you can enable Track, Sync and Remote for a MIDI input. We want to enable Remote )

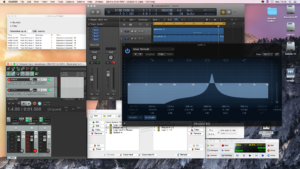
In our example setup, we’ve enabled one modulator on the MIDIator. This is set to receive spectral flux from Analyzer 1, and send this modulator data to midi channel 1, controller 11. We’ve mapped this to Reverb Decay Time on the effect return track. Input sounds with high flux (which means that the sound is probably a bit noisy) will have long reverb. Sounds with low flux (probably a tonal or stable sound) will have short reverb.

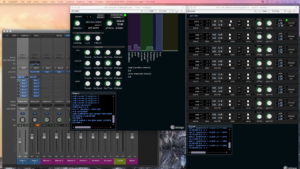
On my computer (windows), I need to open the MIDIator editing window to force it to start processing. Take care *not* to close the MIDIator window, as it will somehow stop processing when the window is closed (This only happens in Ableton Live, not sure why). To get rid of the window, just click on something in another track. This will hide the MIDIator window without disabling it.

Simple crossadaptive mixing template for Logic

Next week we’ll go to London for seminars at Queen Mary and De Montfort. We’ll also do a mixing session with Gary Bromham, to experiment with the crossadaptive modulation techniques in a postproduction setting. For this purpose I’ve done a simple session template in Logic (as it is a DAWs that Gary uses regularly).

logic_screen1
Logic session with two tracks, EQ being applied to track 2, controlled by pitch analysis of the signal on track 1. Reaper (running the analysis and modulator routing plugins) can be seen in the background. The jack patching can also be seen in the lower right part of the image.

To keep the Logic session as clean as  possible, we will do the signal analysis and preparation of the modulation signal in Reaper. This also allows us to use the VST versions of the plugins for analysis and modulation mapping we’ve created earlier. (It should be possible to use these as AU plugins too, but that is somewhat more experimental as of yet). Signal routing between Logic and Reaper is done via Jack. This means that both Logic and Reaper use Jack as the audio driver, while Jack communicates with the audio hardware for physical I/O. The signal to be analyzed (guitar on track 1 in our Logic session) is fed to a separate bus track in Logic, and the output from this track is sent to Reaper via Jack. We analyze the pitch of the signal in Reaper, send the pitch tracking data to the vstMIDIator plugin, and route the MIDI signal from Reaper back to Logic via the IAC bus. In Logic, it is relatively straightforward to map an incoming MIDI signal to control any parameter. You can find this in Logic Preferences/Automation, where there are Learn and Edit buttons towards the bottom of the dialog. To learn a mapping you will touch the desired destination parameter, then send the midi message to be mapped. In our example, we use an EQ on vocals (track 2), and control the frequency of a narrow band in the EQ with the MIDI modulator signal. This way the pitch of the guitar controls the EQ for the vocals.

logic_screen2
The analyzer and MIDIator plugins running in Reaper, with the Logic mixer in the background